


A website needs more than an entry in a domain list. Its files must belong to the intended account, its application must connect to the right database, and public DNS must lead to the prepared server. This guide follows those dependencies in order. It assumes EzePanel is installed, activated and through its first-time agreement and server-setup steps.
Start with a package and owner
As administrator, review the software’s remaining account allowance and create or choose a hosting package. The package controls the tools and resources available to the tenant. Keep those settings distinct from the software subscription you purchased.
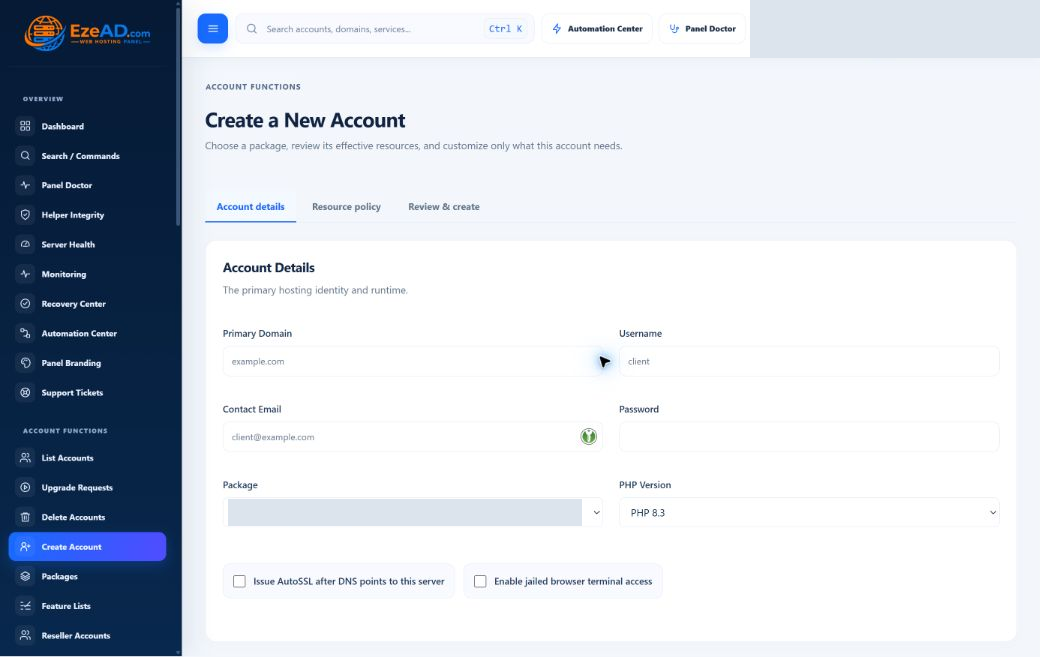
Create the hosting account with a primary domain, unique username, contact details, strong password and appropriate installed PHP version. Prefer package defaults unless this account needs an explicit override. Submit once and inspect the provisioning result; do not create duplicate accounts after an ambiguous response.
Use the account User Panel
Open the hosting account’s User Panel with the intended permissions. Locate its website root in File Manager and upload a simple test page. Confirm it is the root for this domain rather than another account’s files. A page in the wrong directory may upload successfully while never serving visitors.
For a static site, that may be enough application setup. For PHP, check the application’s supported runtime and required extensions. Do not assume that changing the CLI php command changes the website’s PHP-FPM assignment.
Create the database and scoped login
Create a database, then a database user for it. Use the full resulting names, including account prefixes, in private application configuration. Keep the application login separate from the panel administrator password.
If importing SQL, inspect the selected destination and compatibility first. Test with a non-sensitive application copy and retain a backup. Never grant global database-root permissions to repair an application connection. Use the documented database tools and check the actual error.
Publish DNS when the destination is ready
Confirm which provider is authoritative for the domain. Add the required records there, or configure the intended nameserver arrangement. Creating a hosting-side domain does not register the name or automatically change an external DNS provider.
Plan mail separately. Moving a website does not require moving its MX records if email remains elsewhere. After DNS points to the correct destination, use the supported certificate workflow and verify HTTPS for the actual domain. An IP-only test does not validate a domain certificate.
Verify content and a real action
Open the site as a visitor and verify the expected content. Exercise an authorized login or form, confirm a database-backed page and check application errors. Ensure you are not seeing an old cached site on the previous server.
Create a backup and document where it is stored before adding business data. If the account cannot perform an operation, review feature permissions and effective package limits. Use the related guides for the specific failing step rather than changing several unrelated settings at once.
- Confirm the correct website root and account owner.
- Verify one database-backed application action.
- Check the public domain and its HTTPS certificate.
- Keep a documented independent backup.
A final first-website acceptance checklist
After publishing, open the intended public hostname over HTTPS and perform a meaningful application action. For a database-backed site, verify a normal application write without exposing database credentials. Check uploaded files have the correct owner and that scheduled work runs only where intended.
If the website uses local mail, verify incoming delivery as well as login; if it uses external mail, retain the correct routing and records. Make a backup and review how you would restore it separately. Your first website is ready when the required workflow works, not simply when the welcome page appears.
Where to go next
Sources & further reading
Official documentation for the topics in this guide. Check current vendor requirements before a purchase or server change.