
Panel Branding · Root administrator settings
Your hosting identity.
Across panel and email.
Set separate Admin and User panel identities, then give panel notifications recognizable company and support information. These are identity controls—not a page builder or an unrestricted theme editor.
Give supported panel and email surfaces a recognizable hosting identity.
Swipe to inspect · tap the image for full context
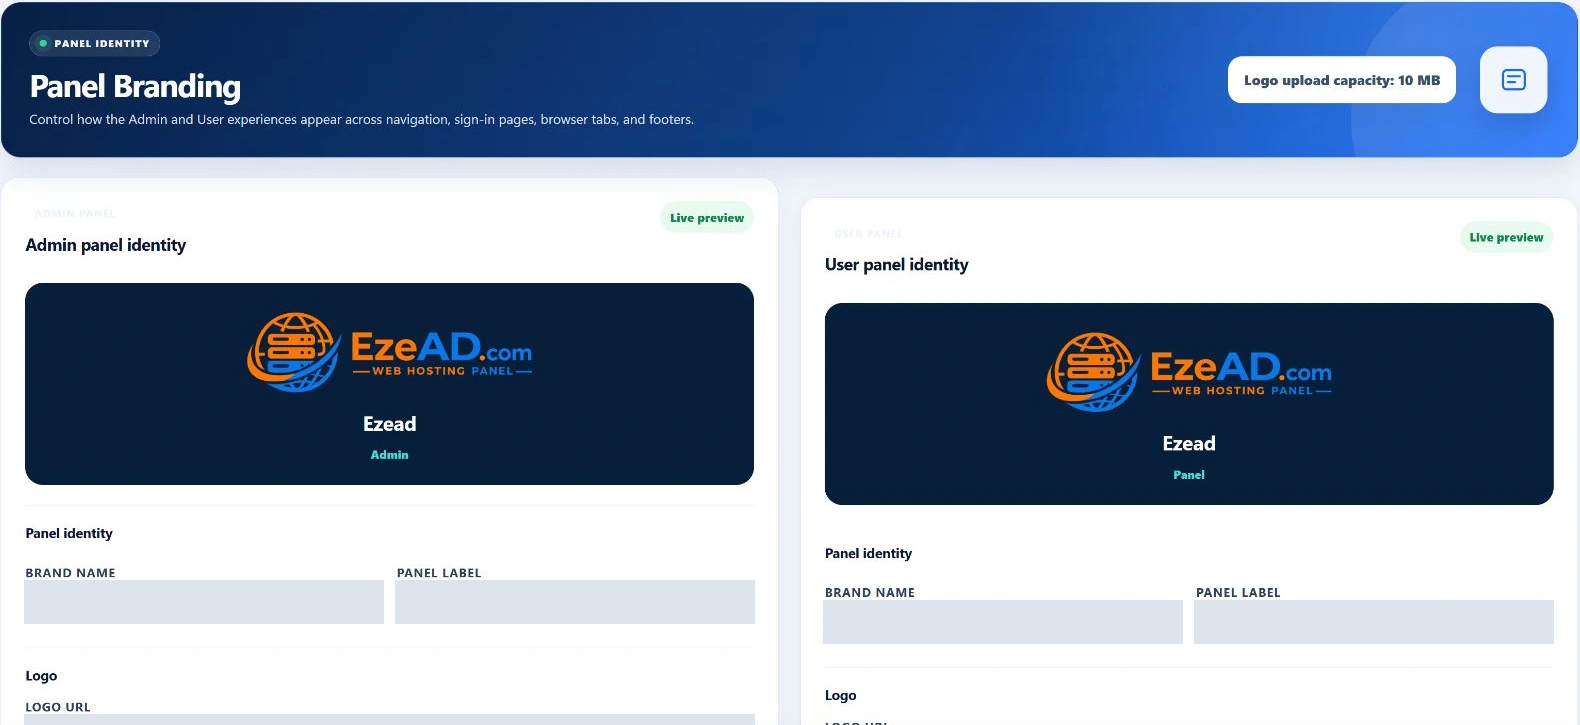
- Admin identity
- User identity
- Notification brand
- Review touchpoints
Three surfaces, distinct settings
Keep operator, customer and email identities intentional.
Set the identity for each audience separately, then review how the supported interfaces use it.
Administrator interface
Choose the operator-facing brand name, panel label and image assets. The Admin sidebar reads these global settings; it does not inherit the User identity automatically.
Hosting customer interface
Configure a separate User panel name, label, logo and browser icon. This concerns the installed hosting panel, not the commercial account portal at app.ezepanel.com.
Panel notifications
Supply company identity, header text, logo and support destinations to the panel email branding provider. Delivery and the recipient’s email-client display remain separate concerns.
Know what each field controls
Identity details with a defined purpose.
- Brand name and panel label
- Name the organization or service, then distinguish the interface with its label. A logo can replace the visible text brand in the sidebar: review the image and text alternative rather than assuming every field appears together.
- Logo URL or upload
- Choose an accepted raster upload, an HTTPS image URL or a local asset path. An external image depends on that host remaining available. Use artwork you are authorized to publish.
- Browser icon
- Set the favicon separately from the full-width logo. A square icon is usually easier to recognize in a browser tab than a detailed horizontal wordmark.
- Login logo width
- Control the login-logo width within the supported range. This is not a global setting for every image or a way to alter the overall login layout.
- Website and copyright
- Store the brand website and copyright text. Rendering depends on the consuming template; do not assume every footer displays every stored field identically.
Prepare artwork that fits
A logo, a tab icon and an email image have different jobs.
Panel logo
PNG, JPG, WebP and GIF uploads are accepted, with a 10 MB limit. The screen recommends a 600 × 240 image. Login width is bounded to 80–320 pixels.
Browser icon
The favicon upload also accepts ICO and has a 1 MB limit. The UI recommends a 512 × 512 image. Do not upload ICO into the normal logo field.
Notification logo
The email-logo field has a 10 MB limit and a recommended 600 × 200 source image. Rendered width is bounded to 120–190 pixels. SVG is excluded by the email branding path.
Notification identity is not mail delivery
Help customers recognize the message and find support.
- Header and company
- Set the email header title and company name. Choose primary and accent colors using six-digit hexadecimal values; invalid values are rejected.
- Logo selection
- A custom email-logo value takes precedence. To inherit the panel logo, clear the custom value and enable the panel-logo preference. The provider uses email-safe image handling rather than arbitrary embedded markup.
- Support destinations
- Configure a valid support email address and HTTPS support link. These tell the recipient where to get help; they do not create a mailbox or configure SMTP authentication.
- Website and footer
- Set the HTTPS website link, its visibility preference and footer text. Review destinations and wording before sending customer notifications through the separate notification workflow.
Saving branding does not prove that SMTP connects, that a message reaches the inbox, or that every mail client renders images. Mail transport and delivery evidence belong to a separate check.
Change, save, inspect
Make a branding change that you can verify.
Prepare the identity
Choose the intended Admin and User names, permitted artwork and public support destinations. Retain previous values and files if you need a manual return path.
Apply the right scope
Use the root-only Branding screen. Set the two panel identities independently, then configure notification identity. Do not confuse these controls with reseller-specific settings.
Save and reopen
Submit the settings, read the result and reopen the page to inspect stored values. The preview reflects saved configuration. Reopen the page to review the result.
Review the consuming interfaces
Check the relevant sidebar and login presentation, browser icon and supported notification template. Do not send production test messages without appropriate approval.
Scope and boundaries
Brand the supported interface—not an imagined white-label platform.
Technical details
The page requires root-administrator access and CSRF validation. Reseller branding is stored separately and belongs to its own workflow. These controls do not establish custom CSS, arbitrary HTML, a layout editor, SaaS billing-portal branding or a guarantee that every notification uses the same renderer.
Does changing the support address configure email delivery?
No. It changes a public contact destination in branding data. SMTP credentials, connection settings and delivery are separate.
Can I use SVG for email branding?
The email branding path excludes SVG. Use an accepted raster image and check the resulting notification presentation.
Is the preview an instant design editor?
The current screen renders saved values. It is not a verified preview of unsaved edits and does not redesign the page layout.
Will a failed save undo every change?
No atomic rollback is established. Reopen settings, check what persisted, correct validation errors and save the intended configuration.